


|
|
|
#51
 06-30-2009, 08:18 PM
|
||||
|
||||
|
CD,
This build is looking better and better! I sure wish mine turned out that good when I first built her. Thanks all for the kind words! That really helps keep us designers focused on finishing up works in progress! Best Regards,
__________________
Ron Caudillo PM me if you need my email address. 
|
|
#52
07-01-2009, 12:44 AM
|
|||
|
|||
|
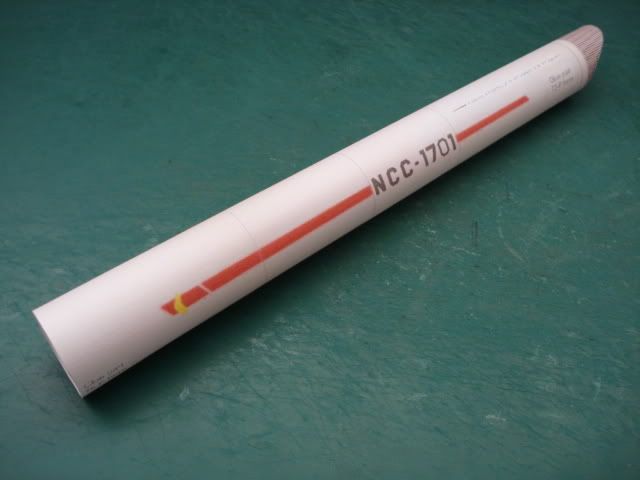
Hey Ron, looking at the blank 1:350 ship gave me an idea. Could you perhaps put up the modular pieces without registry numbers and pinstriping, and maybe include some letters and numbers along with the pinstriping on a separate page? I'd like to create a 1:350 Saladin out of the kit.
|
|
#53
07-01-2009, 01:52 AM
|
||||
|
||||
|
Quote:
__________________
My website www.chrissmodels.webs.com My Facebook page www.facebook.com/chrissmodels
|
|
#54
07-01-2009, 05:21 AM
|
||||
|
||||
|
The secondary hull forward section, although not entirely finished, is ready to be mated to the rear:-
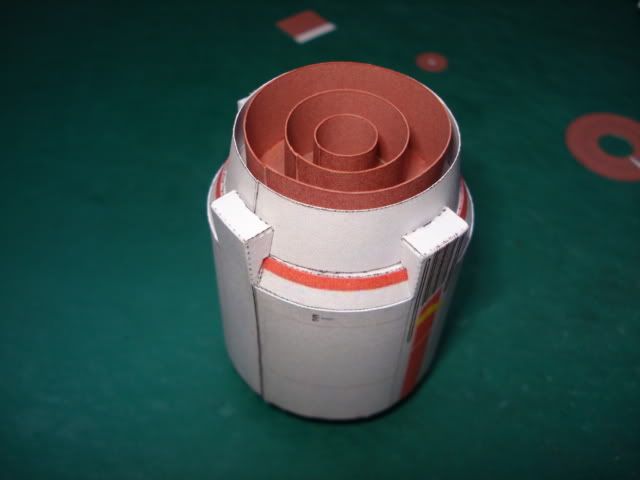 You can see here just how much I had to extend the cutout for the front of the dorsal pylon, thanks for the warning about that Mike  . I did this by gently pushing against the opening with the back of a pair of angled tweezers, then slitting the tabs still further:- . I did this by gently pushing against the opening with the back of a pair of angled tweezers, then slitting the tabs still further:-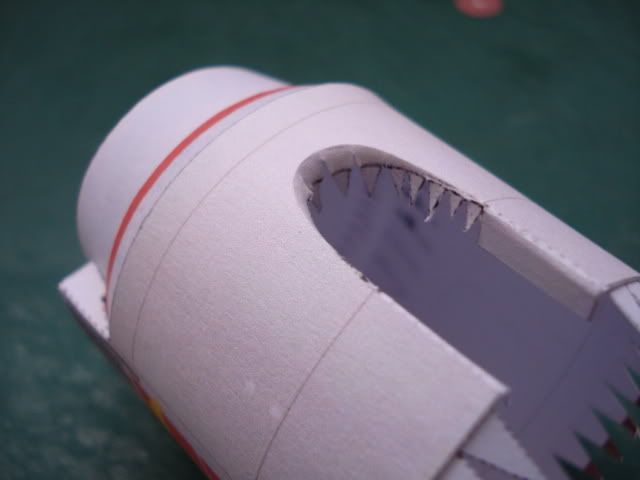 Well, the two halves of the secondary hull are now one. I must confess that I'm not entirely happy with this join. I think there might be a very slight discrepancy with the diameters of the two ends, as they didn't seem to come together quite as expected. Either way there is a slight, but pronounced, step between the two halves. It's not really that bad I suppose - I can certainly live with it!:-  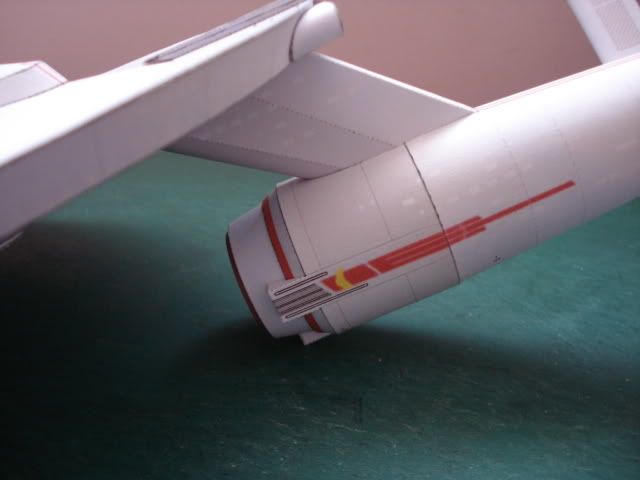 All that's left to do now is to add the last and smallest of the brown deflector amp rings and the dish, and the primary + secondary hulls are finished:- 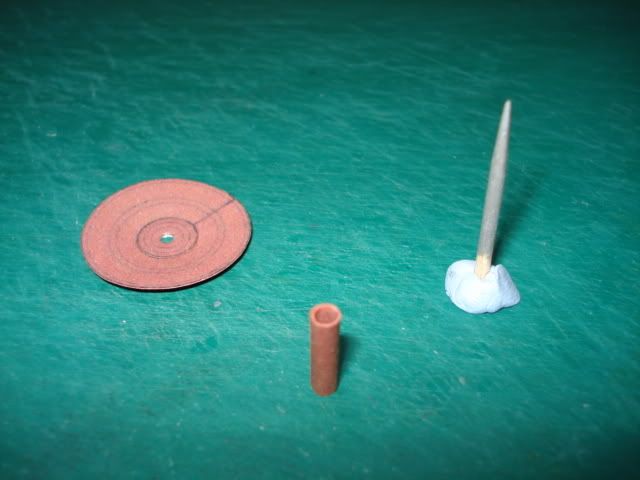 Next up are the warp nacelles!
__________________
My website www.chrissmodels.webs.com My Facebook page www.facebook.com/chrissmodels
|
|
#55
07-03-2009, 05:00 AM
|
||||
|
||||
|
The main body of the port warp nacelle is formed:-
 You can just see the pylon positioner in place here:-  I've glued the rear end on too:-  This is the fin assembly that fits between the nacelle itself and the bussard collector (or propulsion dome, as Ron calls it):-  I came across a slight problem when glueing the petals of the dome - there seemed to be too many of them! Whether this was because I'd cut off all the tabs here and edge glued them or not I don't know:- 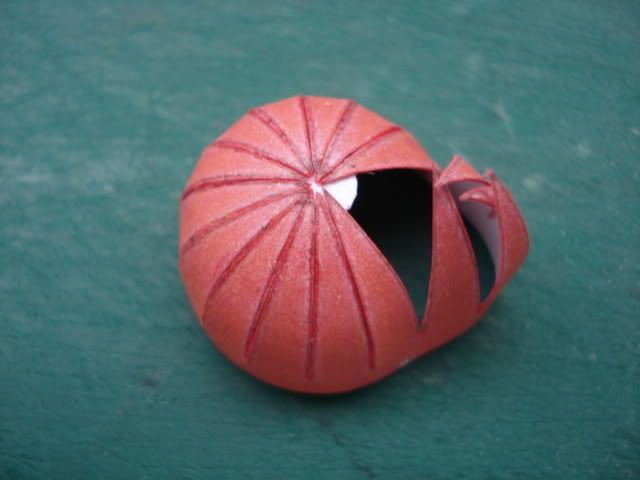 I had to cut one of the petals off to close everything up satisfactorily, and here is the finished article resting in place on the fin assembly:- 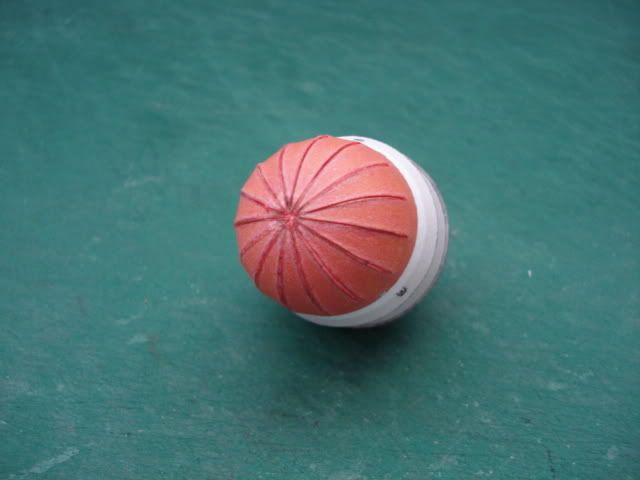 Unfortunately, due to it being one petal short it's a bit smaller than intended and doesn't quite cover up the white area like it should, plus the three 'strap' details don't match up. I'm not quite sure whether to leave it like this or to try again:- 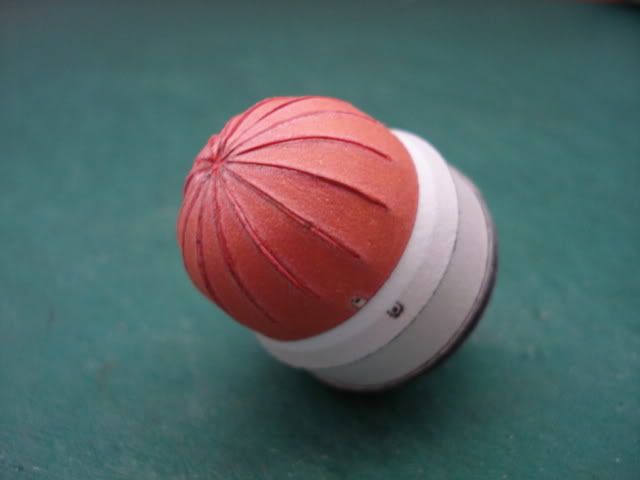
__________________
My website www.chrissmodels.webs.com My Facebook page www.facebook.com/chrissmodels
|
| Google Adsense |
|
#56
07-03-2009, 07:04 AM
|
||||
|
||||
|
UPDATE:- I've just had another go with the starboard nacelle's dome, and this time I was successful in assembling it as intended
. I obviously must have done something different this time, don't know what though!
__________________
My website www.chrissmodels.webs.com My Facebook page www.facebook.com/chrissmodels
|
|
#57
07-03-2009, 07:08 AM
|
||||
|
||||
|
Quote:
Looking great thus far, but never expected any less from your hands mate 
|
|
#58
07-03-2009, 07:13 AM
|
||||
|
||||
|
Thanks Pete
. I really didn't want to do this part any more than necessary as I hate doing petals, but I'm a bit of a perfectionist so I felt compelled to give it another go!
__________________
My website www.chrissmodels.webs.com My Facebook page www.facebook.com/chrissmodels
|
|
#59
07-03-2009, 07:28 AM
|
||||
|
||||
|
Quote:
Keep to your perfection mate and never compromise your builds cos you would never be happy with the end result. You are an EXCELLENT MODEL BUILDER !
|
|
#60
07-04-2009, 09:10 AM
|
||||
|
||||
|
Quote:
.A little more progress - here is the port warp nacelle, very nearly finished:- 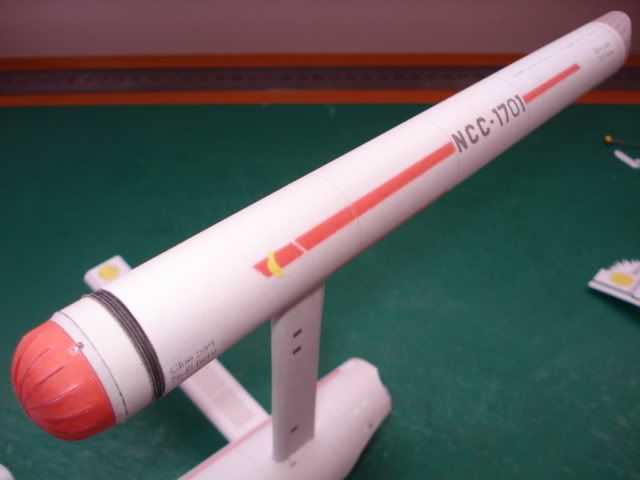 The plan is to get the other nacelle up to this stage as well, and then add all the little greebles and nurnies that will finish them both off.
__________________
My website www.chrissmodels.webs.com My Facebook page www.facebook.com/chrissmodels
|
| Google Adsense |
 |
|
|


 Linear Mode

