


|
|
|
#1
 09-17-2010, 03:12 PM
|
||||
|
||||
|
World Works Games: The Maiden
This is partly a kit review and partly a build diary, so bear with me!
 While 'The Maiden' is not a 'scale' model by any means, meant more for gaming than specific accuracy to any particular ship, the quality of the texturing is considerable, and the model (as I'll note in detail below) is substantial. This is an older kit, released in 2004. I'd always meant to get a copy, and could not resist buying one when RPGNow placed it on sale with the Canals set. While 'The Maiden' is not a 'scale' model by any means, meant more for gaming than specific accuracy to any particular ship, the quality of the texturing is considerable, and the model (as I'll note in detail below) is substantial. This is an older kit, released in 2004. I'd always meant to get a copy, and could not resist buying one when RPGNow placed it on sale with the Canals set. To start, as I've mentioned, the detail in the texturing work is extraordinary. I've another kit by them, 'First Light', with which I was equally impressed. The instructions are very clear, with well laid-out steps and photographs of the process. However, I jumped the gun a little when I started printing as I failed to calculate the total cost of the assembly. There are somewhere around 100 pages (with required reprints of duplicate parts) of full dark colored pages. I very rapidly ran short of color ink (it was down to 1/4 tank) at about page 20, and then by page 35 was out of black (which was down to a little under 1/2). This is where I've stopped. I'll resume the remaining 60 or so pages once I've the spare funds (I spent too much of my budget on Steam games in the last week). I estimate, at the current rate of consumption, to use up the remaining color cartridge and at least 1/2 tank of the black. This props the sum total cost of the kit to around $75 ($10 in cardstock; $35/$22 colour/black cartridge; $4 for the kit + $2 for the foamcore). Decking Straightening the Foamcore To start with, after cutting out the pieces of decking I needed to flatten the foamcare I had, as I stored it vertically (having no place to store a 2'x3' sheet anywhere else). This took about 2 days with varying weights and balances. The decking assembled well, and cutting/trimming was without incident. I printed two copies of the steerage parts, one on card the other on paper, and used the paper to line the interior of the lightvent house (as I used the transparencies in place of the textured glass). I also used the transparent hold covers when assembling the decking. Lightvent 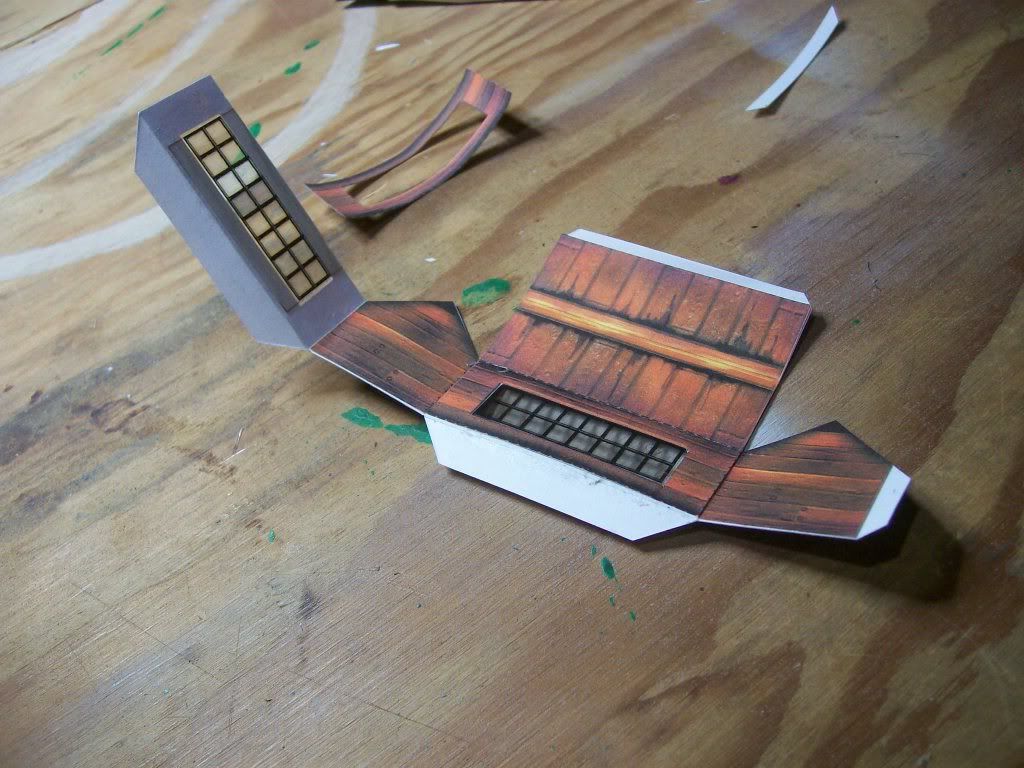 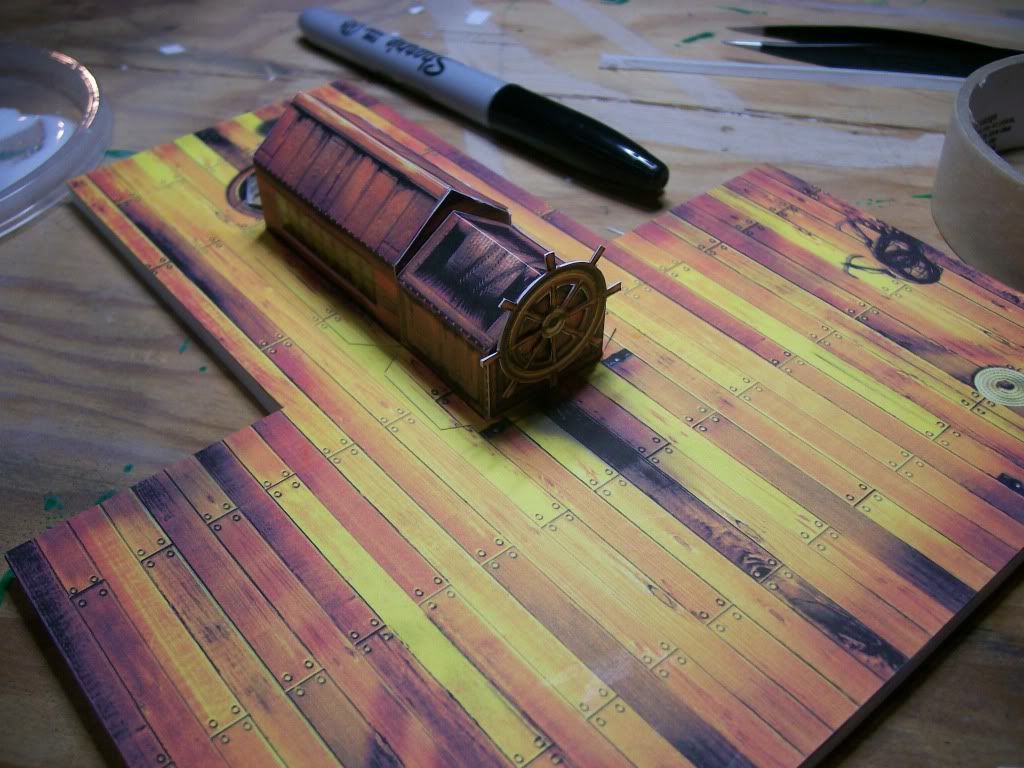 The bow was a little tricky to assemble, and I suspect I have an extra layer on the card tab on the prow, which is causing me some fit-up issues on the decking above, but it went together with little unintended warp. The doors can be cut to open/close. Bow 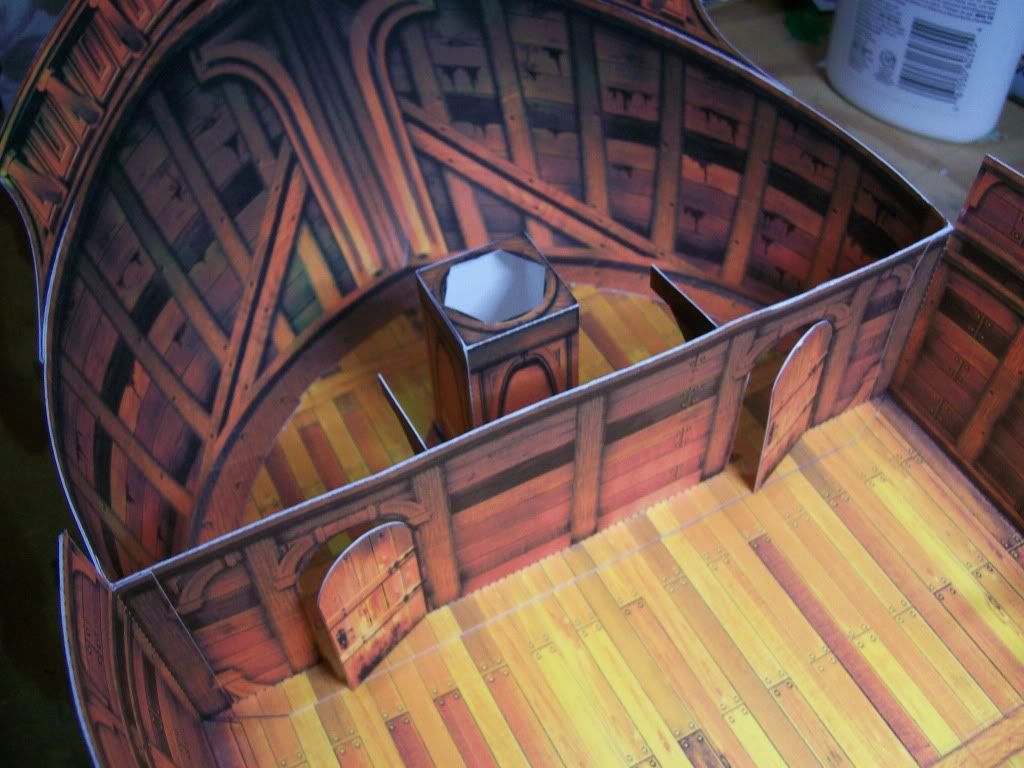 The remaining hull sections warped fairly considerably on me, although I blame the glue not the design. The textures are two-sided and the hull runs up the height of the main deck in one section. The beam supports (running up the side) help considerably with the warp, and as well support the main deck. 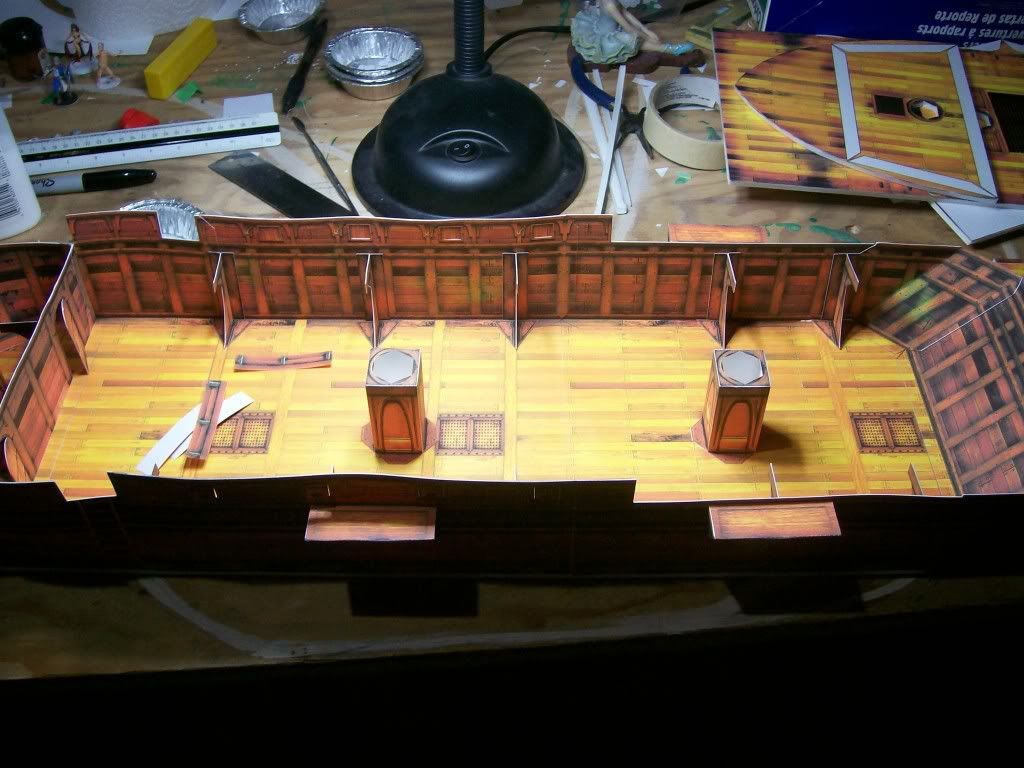 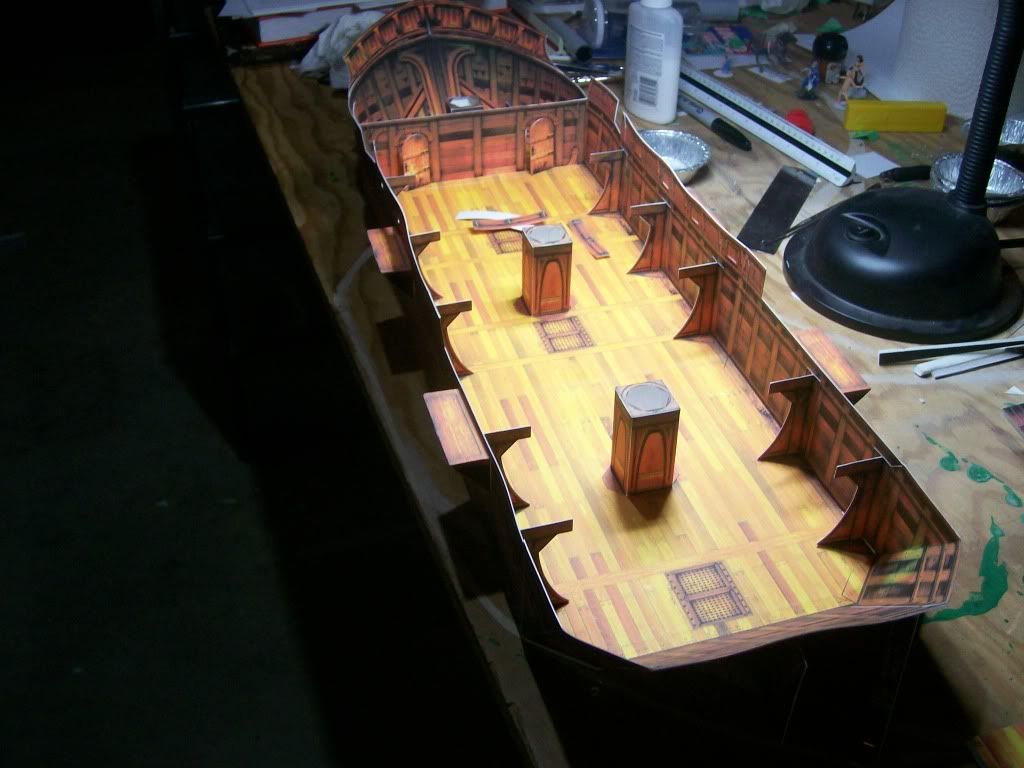 Finally, the mast supports help align and support the main deck, which fits quite nicely in three sections. There are a few fit-up problems, especially on the bow and stern, although I personally blame the builder ( :D ) not the designer. The gunports can be cut to 'open'. Enterprising builders could probably make more of this than I have currently. Thus far there is great opportunity for lamination, although that will drive up the printing cost. 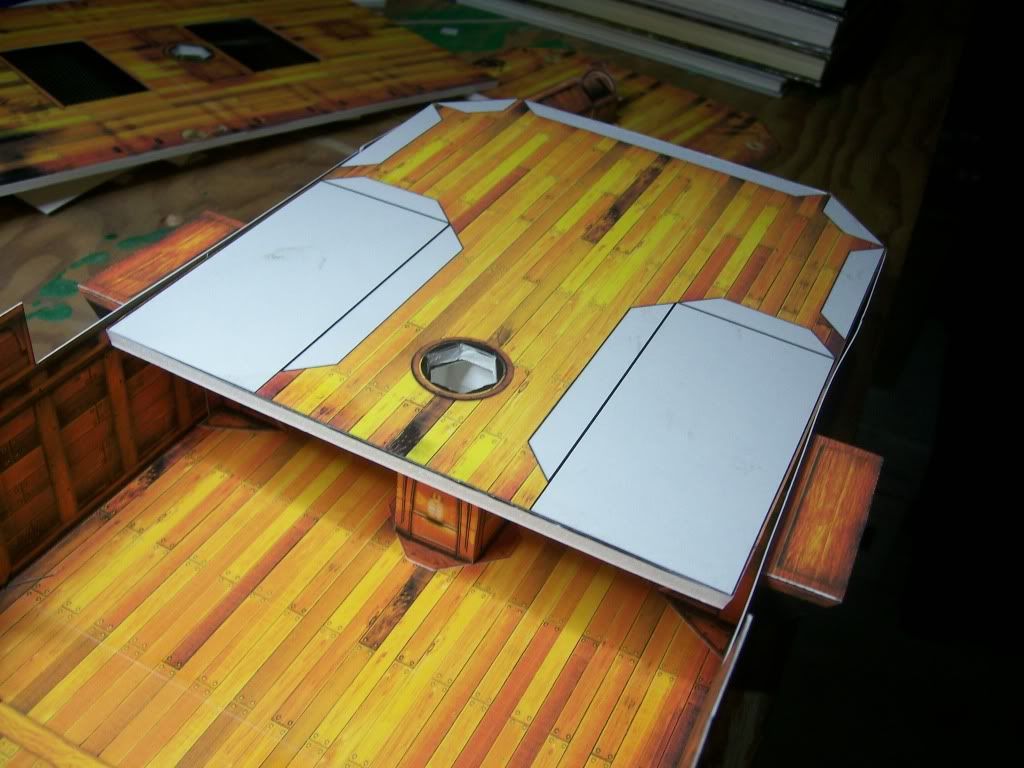 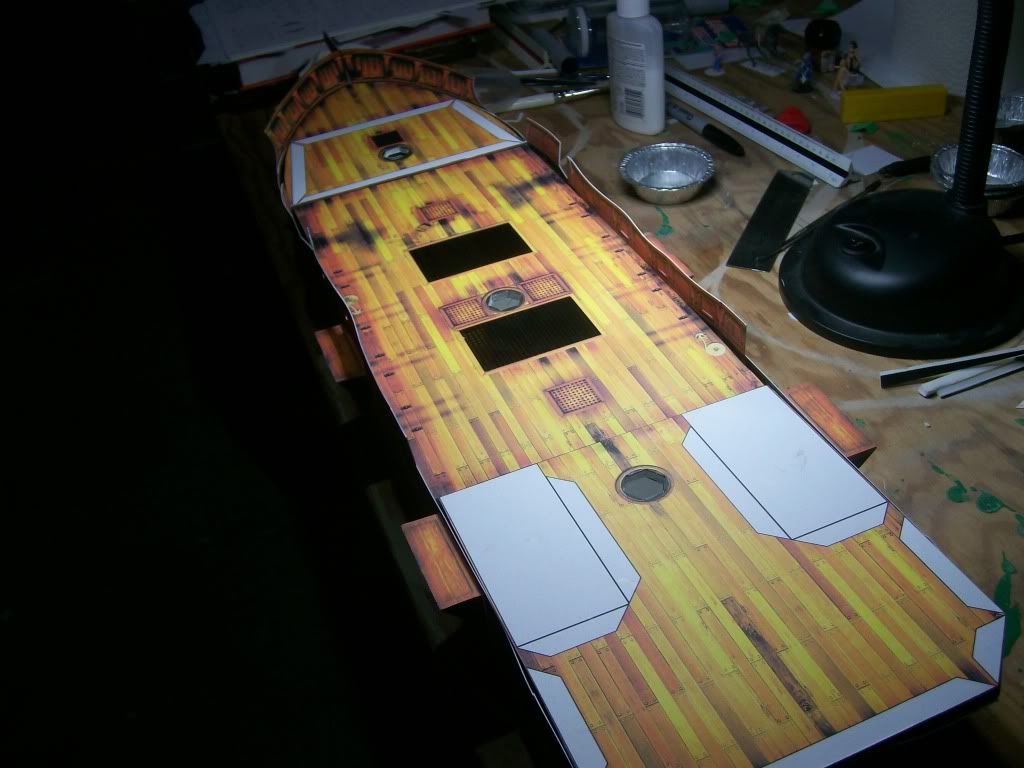 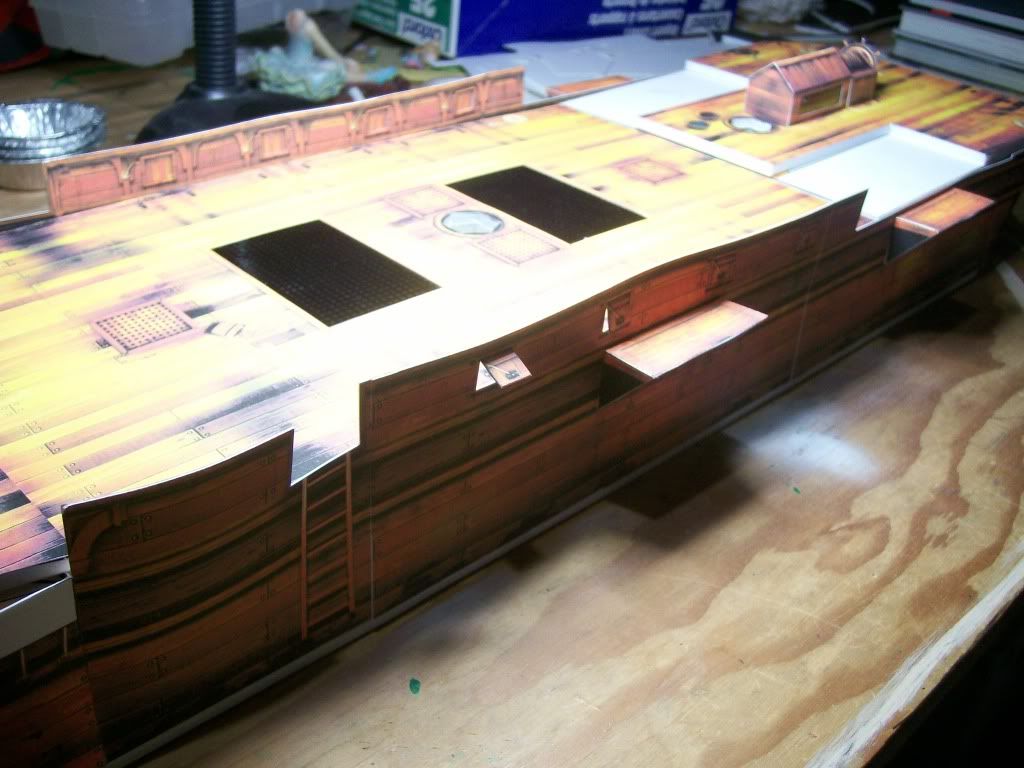 Length The model is huge, running 31 inches from the tip of the bowsprit to the stern. I expect it will be at least as tall, once the sails are assembled. I don't know why I didn't consider this before printing but oh well. I'll find a use for it one of my games yet. Thus far it has been an enjoyable build. More to come! Enjoy! Tirick
__________________
For updates on all my design projects, or to download any of my releases, please visit my site, TCF Gaming 
|
| Google Adsense |
|
#2
09-29-2010, 03:28 PM
|
||||
|
||||
|
I got my hands on a black ink cartridge, and braved the next step: the Stern-castle.
At only a handful of pages, this was a fairly simple component, but it really adds to the shape of the vessel, and indeed makes her look a little less like a blasted-out derelict. I ignored the instructions for portions of this build, which recommend adding the windows after the final assembly. Instead I took a page from the First Light instructions and added the transparent windows as a 'sandwich' between the folded halves. You can see in the first shot the blacking I added before gluing the windows in place. Blacking 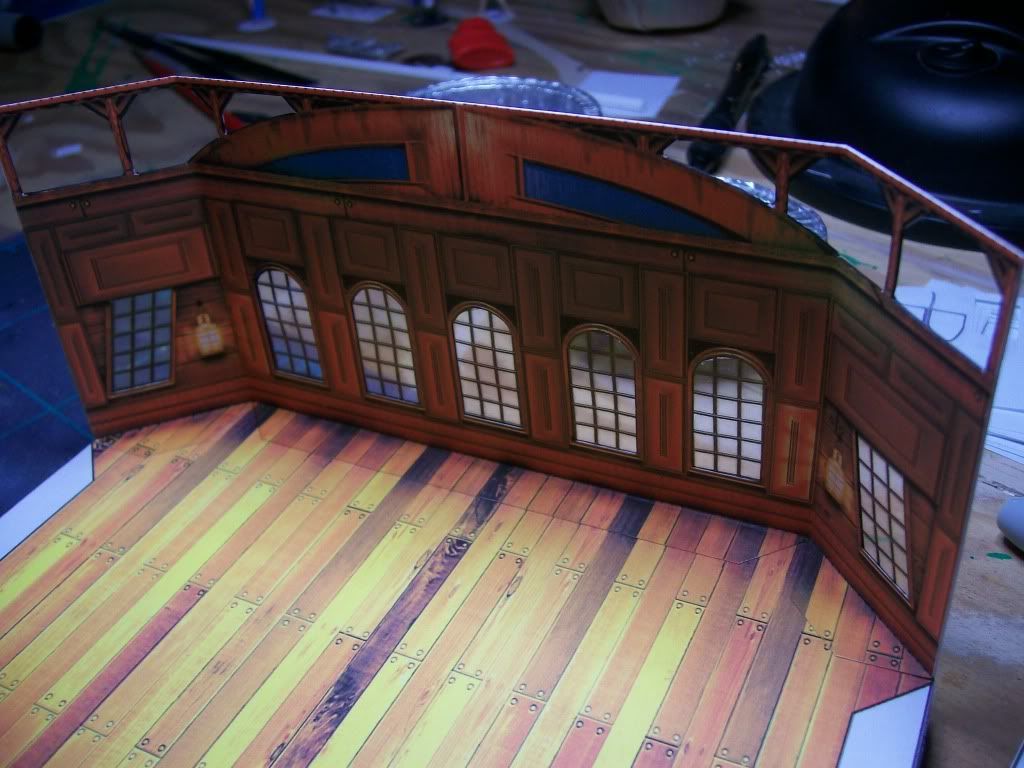 As with the main hull, the instructions were really straightforward, leading in nice neat steps to each required component. My only 'real' complaint is the lack of a tab on the out walls surrounding the stairs. with no connector the side flaps loose. I tacked it with a bead of white glue, but this is a design flaw in my opinion. WIP 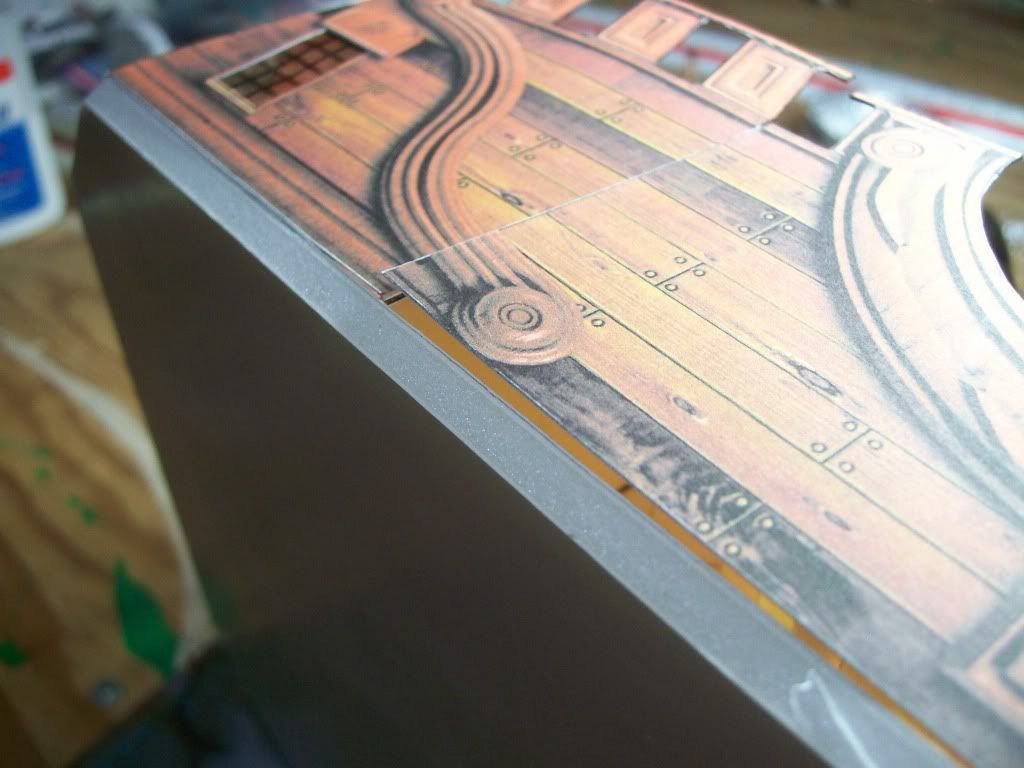 Mostly built 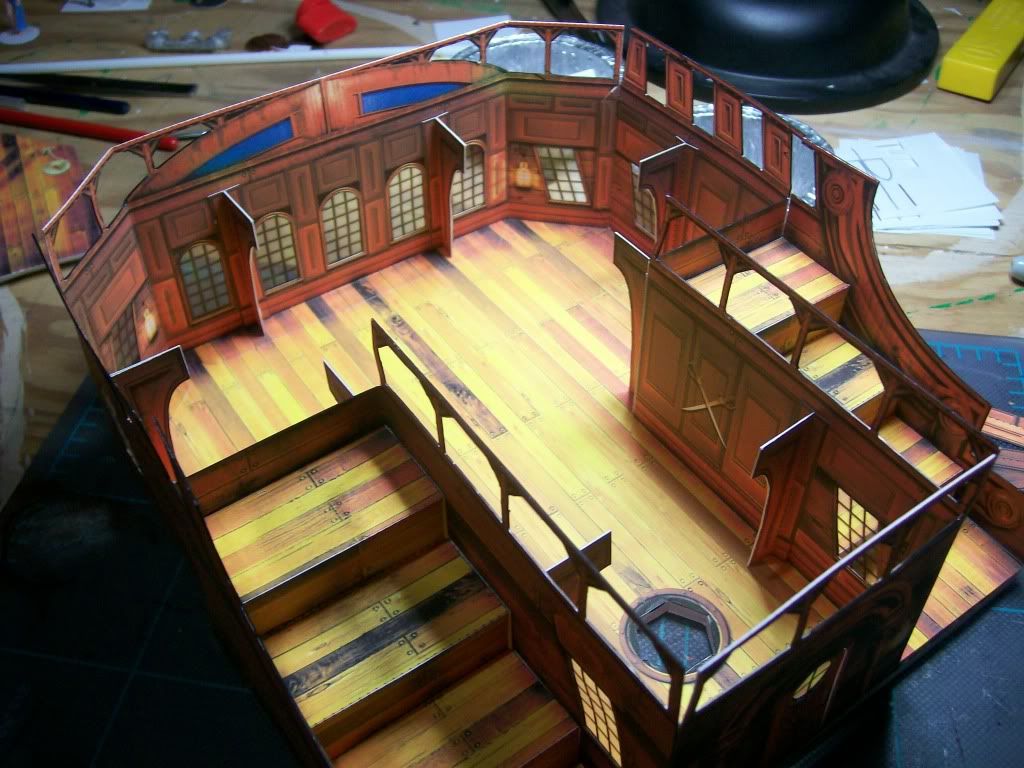 The Stern deck is designed to sit neatly into the rails, and has a nice snug fit. 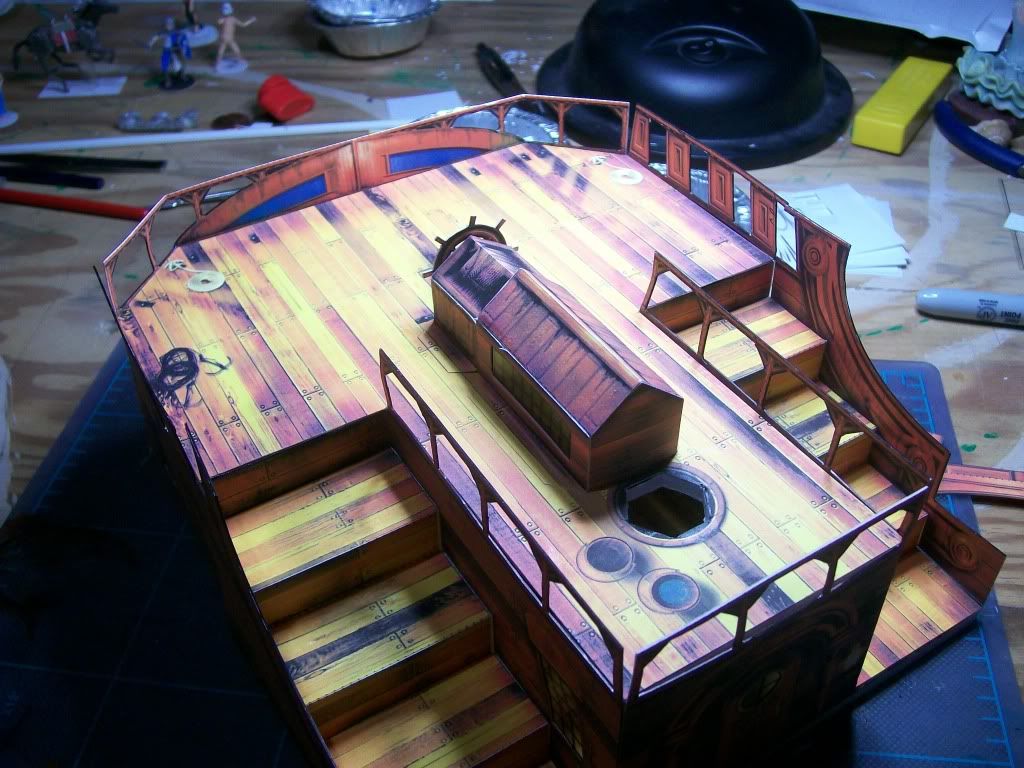 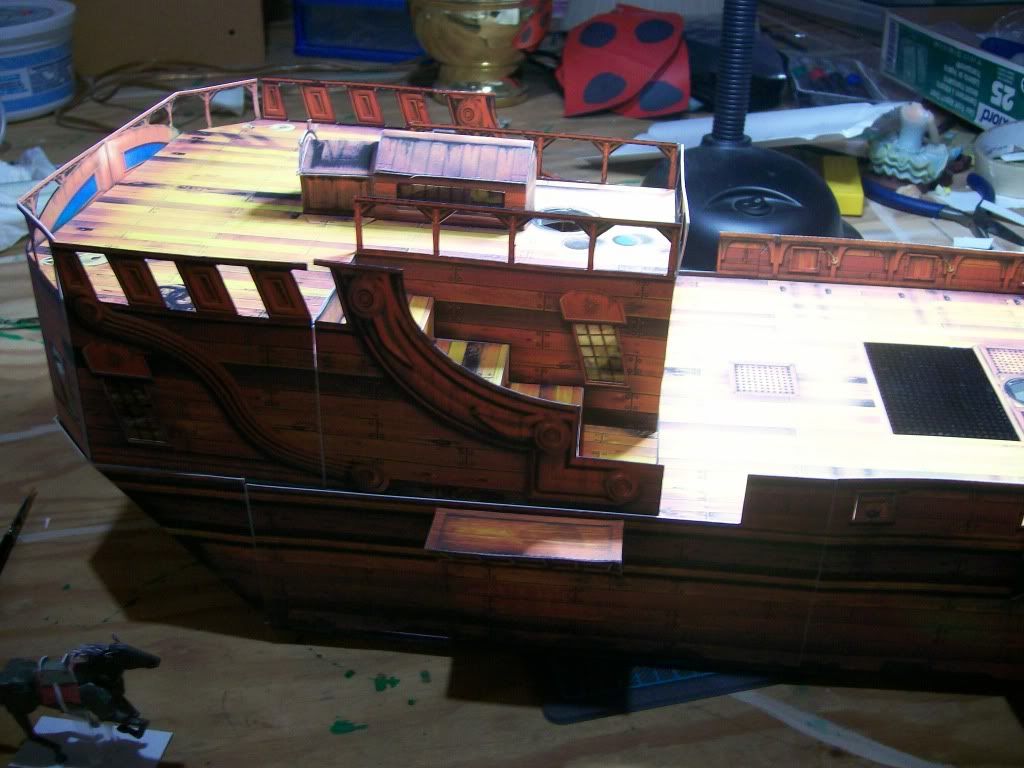 Some figures in the shots for comparison. The model seems well suited to 35mm (1:50, but I've no doubt 28mm would look great as well.  In a few weeks I hope to tackle the Forecastle, and then onto the masts and sails. Enjoy! Tirick
__________________
For updates on all my design projects, or to download any of my releases, please visit my site, TCF Gaming
|
|
#3
01-01-2011, 01:36 PM
|
|||
|
|||
|
Nice write up!
I agree that its a HUGE model and it consumes HUGE amounts of ink! I pretty much killed an HP #57 ink cartridge ($45) printing it out for my build. I did a spreadsheet for the materials cost of this model and with foamcore, ink, purchasing the model, and incidentals it ran about $85 for me. (Now I kinda wish I hadn't run the numbers <sigh>). On "Warping". I have discovered that when assembling the sections where you double over and glue to make a two sided piece the best thing to do seems to be 1) Have a flat surface (I have a 2'x3' sheet of tempered glass from an old display case that I use) 2) Use 3m brand "Super 77" spray adhesive on the parts 3) Use a small silicone rolling pin as a "burnisher/roller". I use a Fiesta "Sil-Pin Junior". It has the additional bonus of really easy water cleanup if you get adhesive on it! Using this method I get nice solid and straight pieces. However I have to admit that I have absolutely no idea how the long term durability will be. Im going to do as you did and sandwich the windows in the Sterncastle and other parts. Thats pretty much what Ive done with the air vents so far. I agree that the lack of a tab in the sterncastle outer walls feels like a flaw in the design. Ill probably use a bead of hot-melt glue myself. Give me a little time to catch up on my build and we'll compare photos Dale
|
|
#4
01-01-2011, 06:49 PM
|
||||
|
||||
|
I estimated around $75 for the total cost (including paper), although I've no real idea how much I've spent thus far. I use white glue (Elmer's Glue-All), which is pretty durable long-term (my first design, a snowspeeder, was put together about 8 years ago, and is still holding strong), although causes severe warping on large pieces. I used UHU glue sticks for the Firstlight set, which was great for warping, but became brittle after a few years, so several of the parts have now separated.
I actually got the sandwich idea from Worldwork's Firstlight set, which is kind of funny as it was released before the Maiden, although from a different designer I think. In all I am pleased with their work. Very high detail on the images makes up for the rough detail on the physical model. I can't wait for an excuse to print and use their canals. To prevent warping I use stacks of Roleplaying books. I have about three dozen lying about, and they are both large and heavy. Works well most of the time, although I like your idea about the rolling pin! Tirick
__________________
For updates on all my design projects, or to download any of my releases, please visit my site, TCF Gaming
|
|
#5
01-01-2011, 09:45 PM
|
||||
|
||||
|
Thanks
Taking a break in my own build thread I found this one. Very nicely done. OK! I looked at the pictures and read the odd line or two but a very entertaining build indeed. I wish I'd skipped the cost though. lol
Thanks for sharing. This looks like a very colourful model and one I would like to try myself in the near future. Cheers Jim
|
| Google Adsense |
 |
|
|


 Linear Mode

